Android Device Setup
To record a trace, let’s first get you set up.
These preparatory steps only need to be once.
1. Install PS Companion app
You will use PS Companion app later to upload traces and screen recordings to PS Tool. Alternative source for downloading PS Companion app
2. Log in with your PS Tool credentials
To login to PS Companion app, you can use the same credentials you created while registering at productscience.app or use Google authentication.
Click here if you forgot your credentials.
Click here if you don't have an account yet.
3. Make sure tracing is enabled
Individual phones may have different ways to do this, but these are general guidelines. Please review these settings even if you are familiar with trace recording on Android devices, there are some specific settings.
For complete documentation, see the Official Android Documentation.
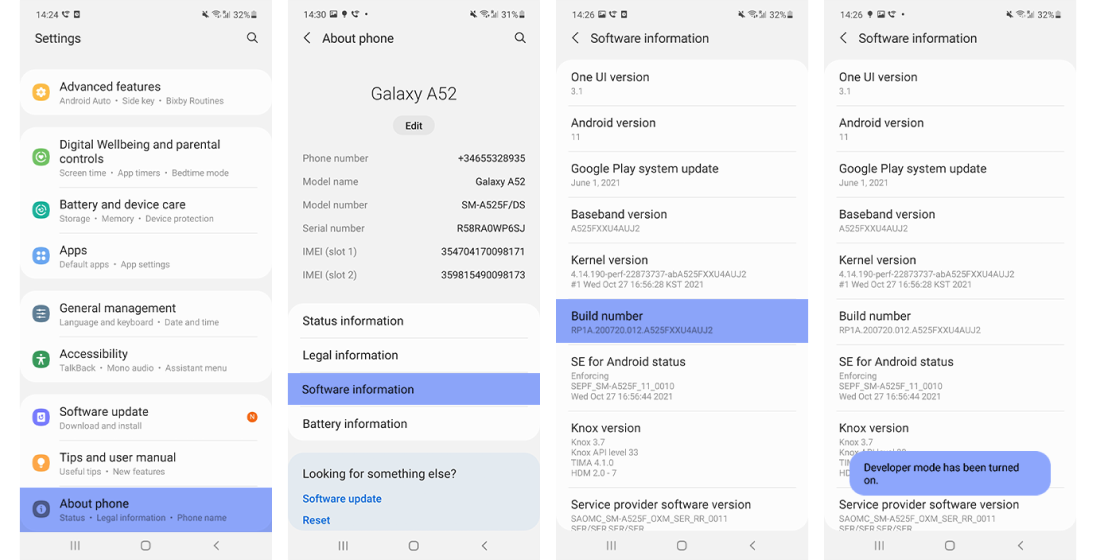
Enable developer options and USB debugging
- Settings > About phone > Software information > Build number
- Tap the Build number option 7 times

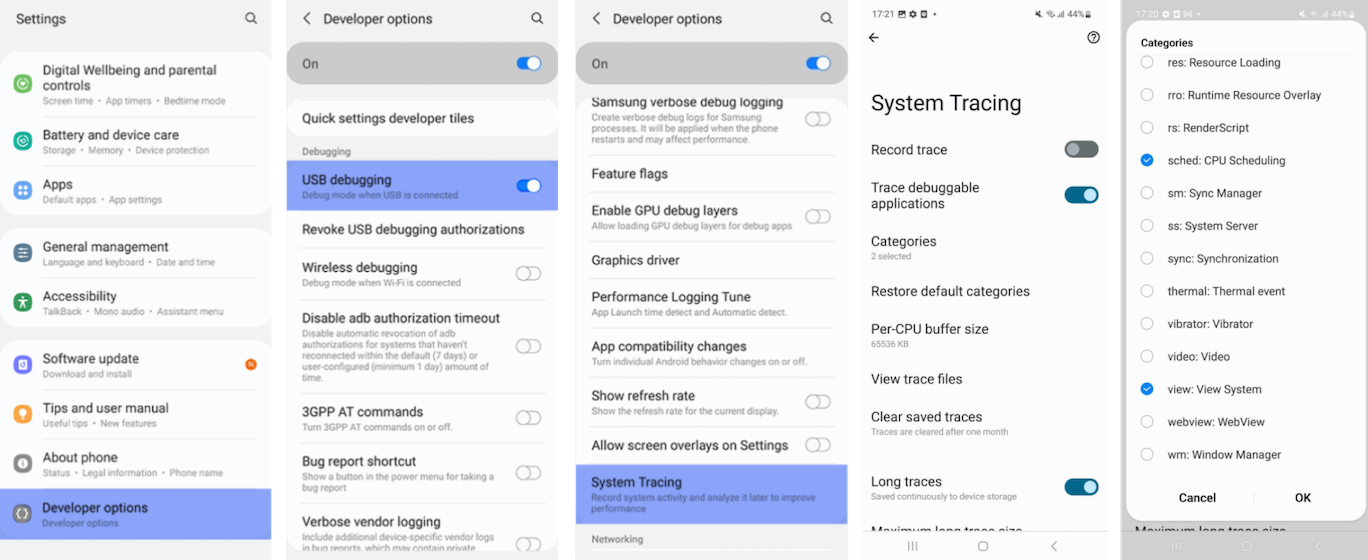
Enable tracing and adjust corresponding settings
- Settings > System > Developer options > Debugging section > System Tracing
- Make sure to turn off all options in Categories except 'sched: CPU Scheduling' and 'view: View System'

- Set Per-CPU buffer size to maximum
- Enable Long traces
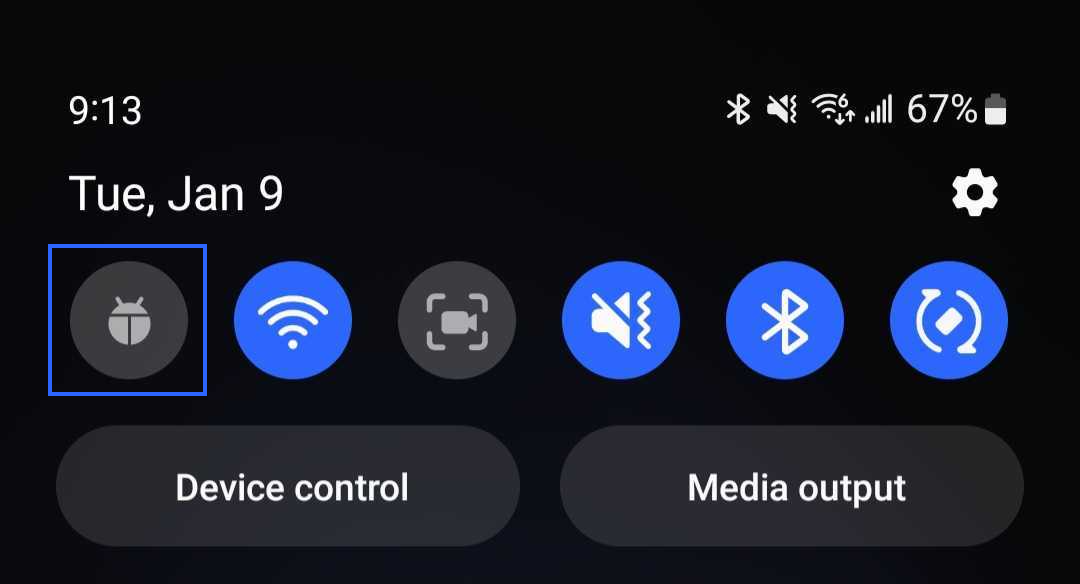
- Enable Show Quick Settings tile - this will add the Record Trace tile to the Quick Settings panel

4. Make sure that you have Screen Recording at hand
Source Google
- Swipe down twice from the top of your screen to reveal Quick Settings tiles
- You might need to swipe right to find Screen Recorder
- If it's not there, tap 'Edit buttons' and drag Screen Recorder to your Quick Settings. 'Edit buttons' can be accessed using the 'More Options' button in the upper right corner of the screen.
- If you don't have the built in screen recorder, we recommend you to download 3rd party apps such as Screen Recorder - XRecorder