Android Trace Recording
Record
1. Install instrumented app
Install the app you want to analyze that is instrumented with PS plugin. Don't have the app? Learn how to build the instrumented app here.
2. Select a user flow you want to analyze
At Product Science, performance optimization starts with defining key user flows that bring the most value to users.
What is a user flow?
There are several ways to select a user flow:
- [Preferred] An "Action-Reaction" one-step flow. Here, the user starts with an "Action" (pressing a button, swiping, selecting a menu item, etc) and you measure until a "Reaction" (new page being fully displayed, etc). These flows are clean and simple to analyze.
- More complex flows. Sometimes, there are multiple steps that need to be strung together to get an idea of the performance of a feature. It can make sense to have flows like these, but consider carefully if they can be broken down into smaller parts.
Either way, a sequence of functions execute before the user finally arrives at the final state ("Reaction"). This is where our AI technology comes into play—highlighting the sequences that formed into what we call execution paths.
Note: User flows should be short in length, 30 seconds or less, to enable the analysis to be a manageable size.
3. Get to the beginning of your user flow
Before you start recording: 1. [Optional Step] Quit all open apps so nothing slows down the app you are measuring. 2. Navigate to the beginning of your user flow. If recording a trace for app start, just navigate to the icon for your app on the Home screen.
4. Start screen and trace recording
Start both the screen and trace recording as described above.
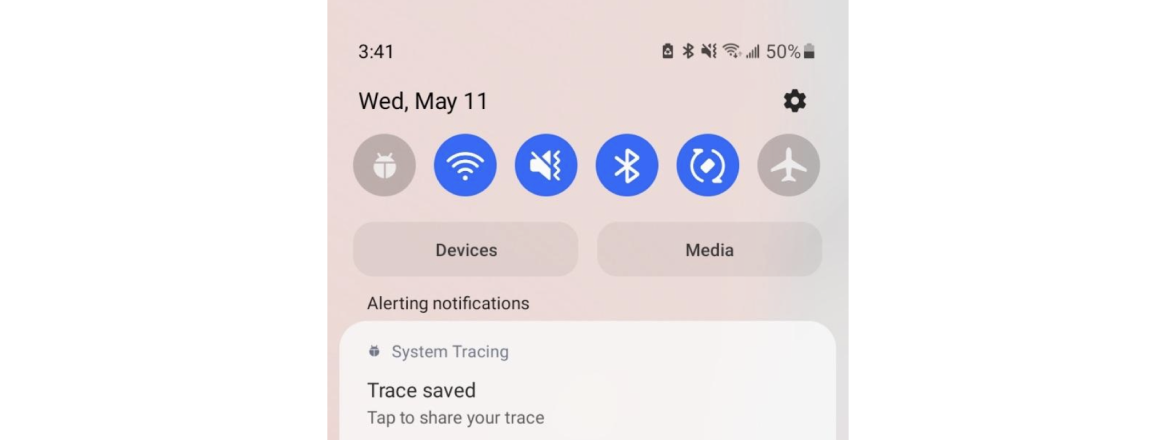
The 'Record trace' button should be available in your quick settings tile. If it is not, go back to the section on enabling trace recording and ensure you enabled the Show Quick Settings tile.

5. Execute your user flow
Perform the user action to execute the user flow you are analyzing.
6. Stop recordings at the end of your flow
When you have reached the end of the user flow ("Reaction"), swipe down from the top of your screen again to access Quick Settings and tap both the "Record trace" and "Screen recorder" buttons to turn the recordings off.
Upload
7. Upload your trace and video to PS Tool
- Open your notification panel > “Tap to share you trace”
- Tap the notification. You will have the option to save it or export it to different apps
-
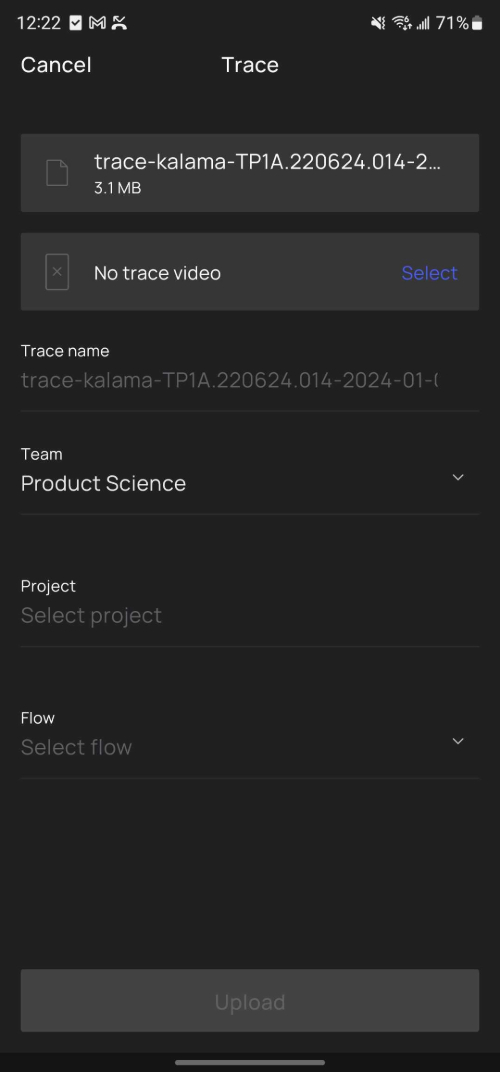
Select the Product Science app (PS)
-
Name the trace, assign it to the relevant user flow folder
Attach screen recording
-
On the same screen, while the trace details screen is still opened, tap "Select"
-
Phone library opens > select the screen recording
- Once the trace and video finish uploading and processing, you can view your trace in PS Tool. The uploaded trace will appear in your productscience.app User Flow Library.